Tutorial
Build a viral consensus genome
Map a sample's reads to a reference, call a consensus genome with ViralConsensus, and check that it finds the mutations you know are there. All in your browser.
What you will learn
- Build a consensus genome from mapped reads with ViralConsensus
- Understand the depth, quality and frequency rules behind each consensus base
- Check a consensus against its reference with the NM and MD tags
- See why poorly covered positions become N
The data
A simulated sample of bacteriophage PhiX174 (NC_001422.1) with six point mutations at known positions (612, 1450, 2201, 3077, 3999 and 4810), sequenced as 1,200 reads of 150 bp (about 33× coverage, 0.5% errors), plus the reference genome. Because it is simulated, you can check the answer.
Tools in this tutorial
- minimap2
- Aligns DNA sequences, from short reads to whole genomes, against a reference. It writes SAM for downstream tools or PAF, a plain table of where each sequence matches.
- samtools
- Works with alignment files (SAM, BAM): sorts them and reports mapping statistics, coverage and per-position read counts.
- ViralConsensus
- Builds a consensus genome from reads mapped to a reference, writing
Nwhere the evidence is too thin to call a base.
Watch it first
The whole tutorial in under 3 minutes, recorded in the live app. The run is sped up.
Steps
- 01
Load the files
Open the Workflow Builder at biochef.app. In File manager, upload
phix174.fastaandsample-reads.fastq, and ticksample-reads.fastqfor the first Input node. New to the editor? The map reads tutorial shows each of these moves with screenshots. - 02
Map the reads to the reference
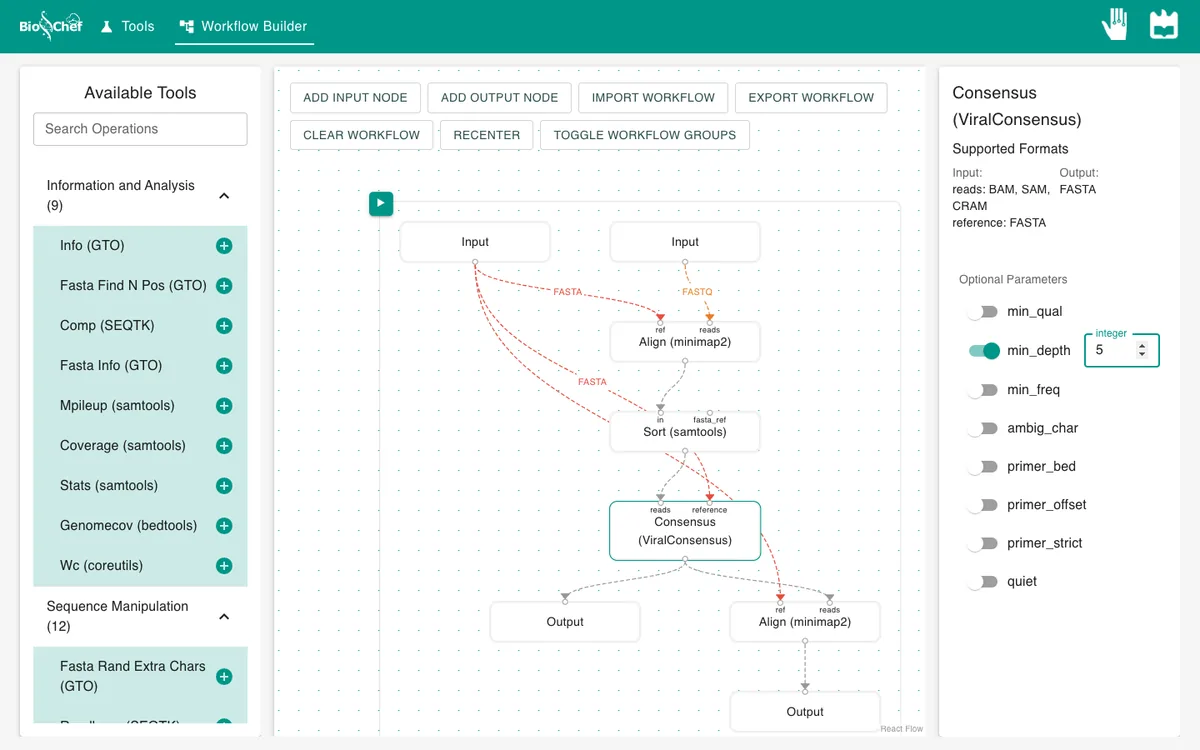
Add Align (minimap2) and connect the reads to its reads dot. Add a second Input node with
phix174.fastaand connect it to ref. Switch on sam_output, then add Sort (samtools) after the aligner. - 03
Add the consensus caller
With the Sort node selected, search
consensus. There are three: pick Consensus (ViralConsensus). Connect Sort to its reads dot and the reference Input to its reference dot: the same reference feeds two tools.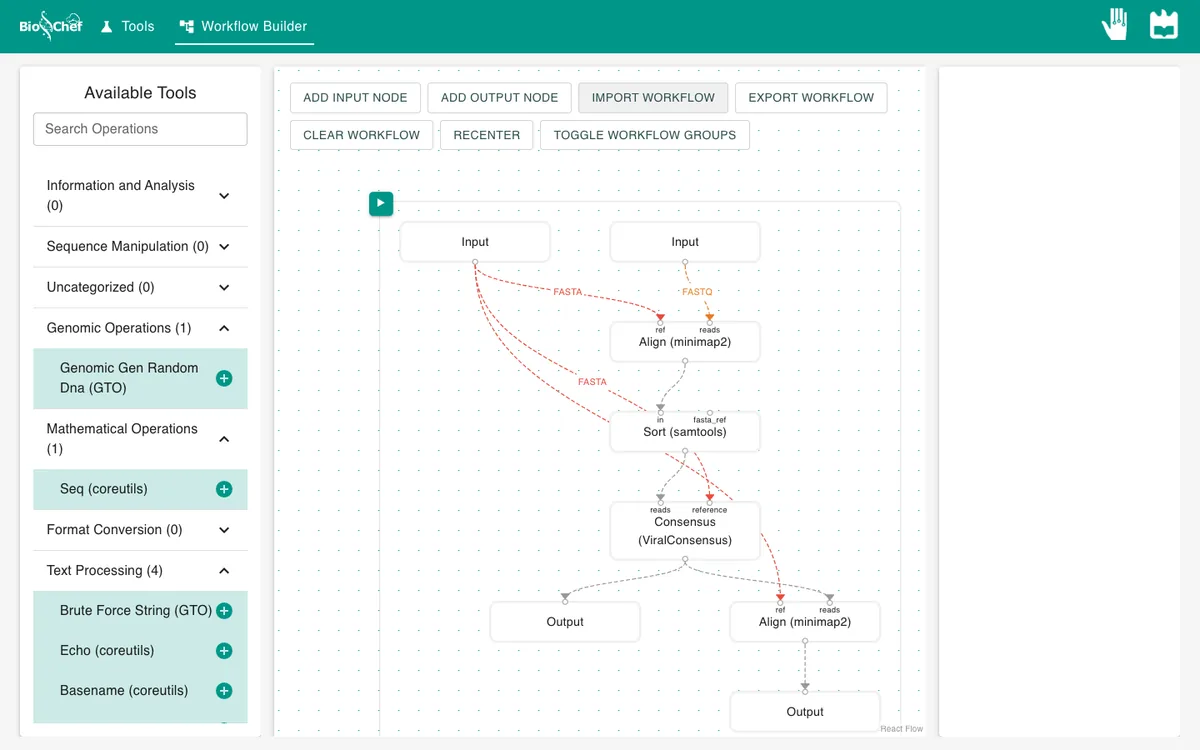
- 04
Look at the settings
Click the consensus node. Its settings are off, so ViralConsensus uses its defaults: a base needs quality 20 or more (
min_qual), at least 10 reads covering the position (min_depth) and more than half of them agreeing (min_freq). Positions that fail get anN.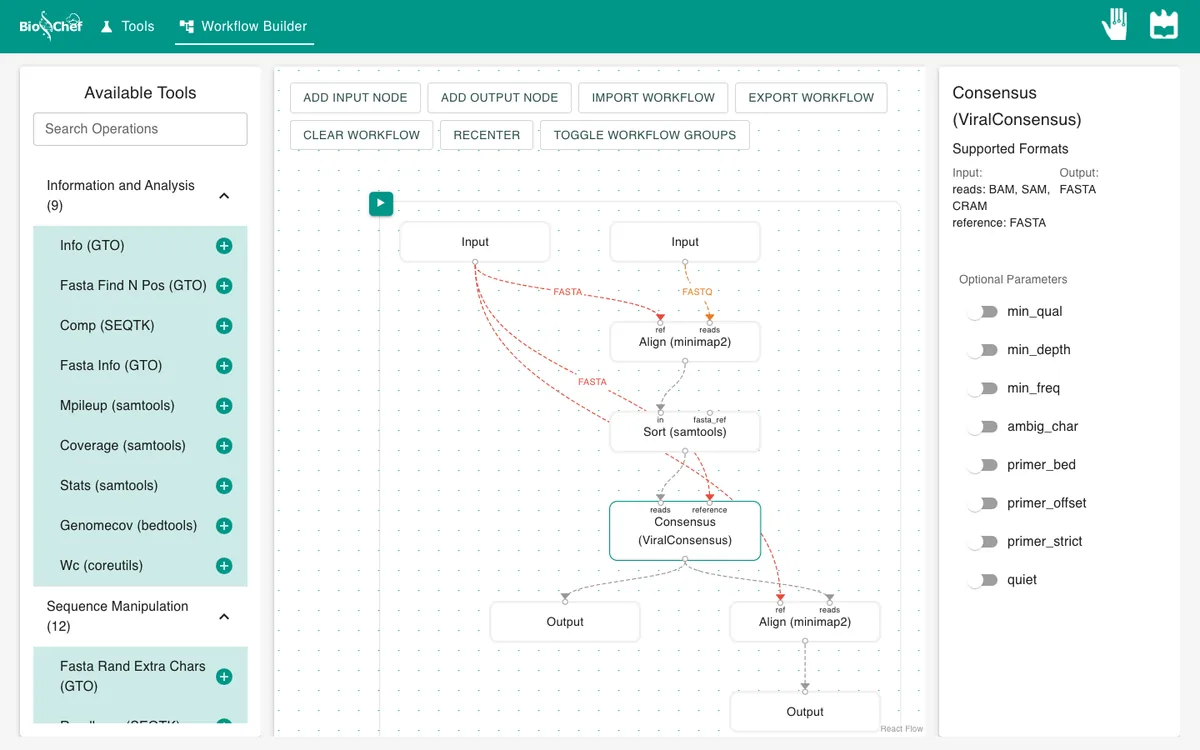
- 05
Run and read the consensus
Add an Output node after the consensus and press ▶. The Output holds the consensus genome in FASTA. Its header records the settings used:
--min_qual 20 --min_depth 10 --min_freq 0.5.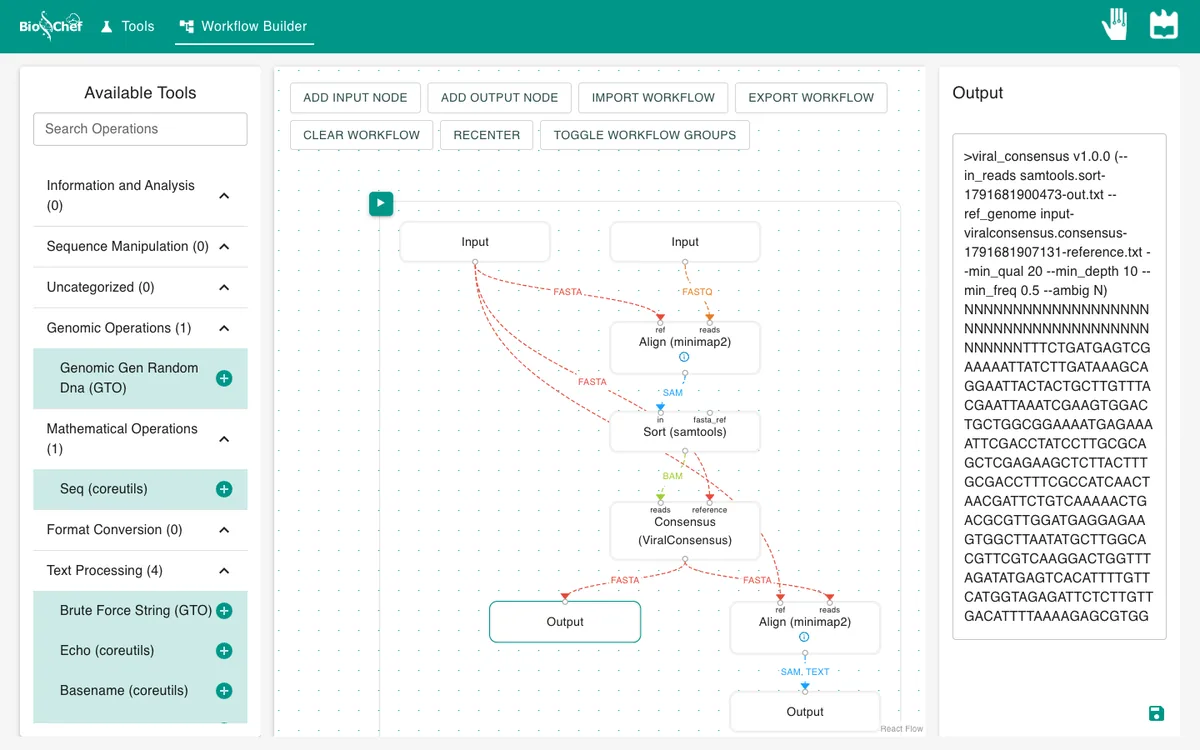
- 06
Check it against the reference
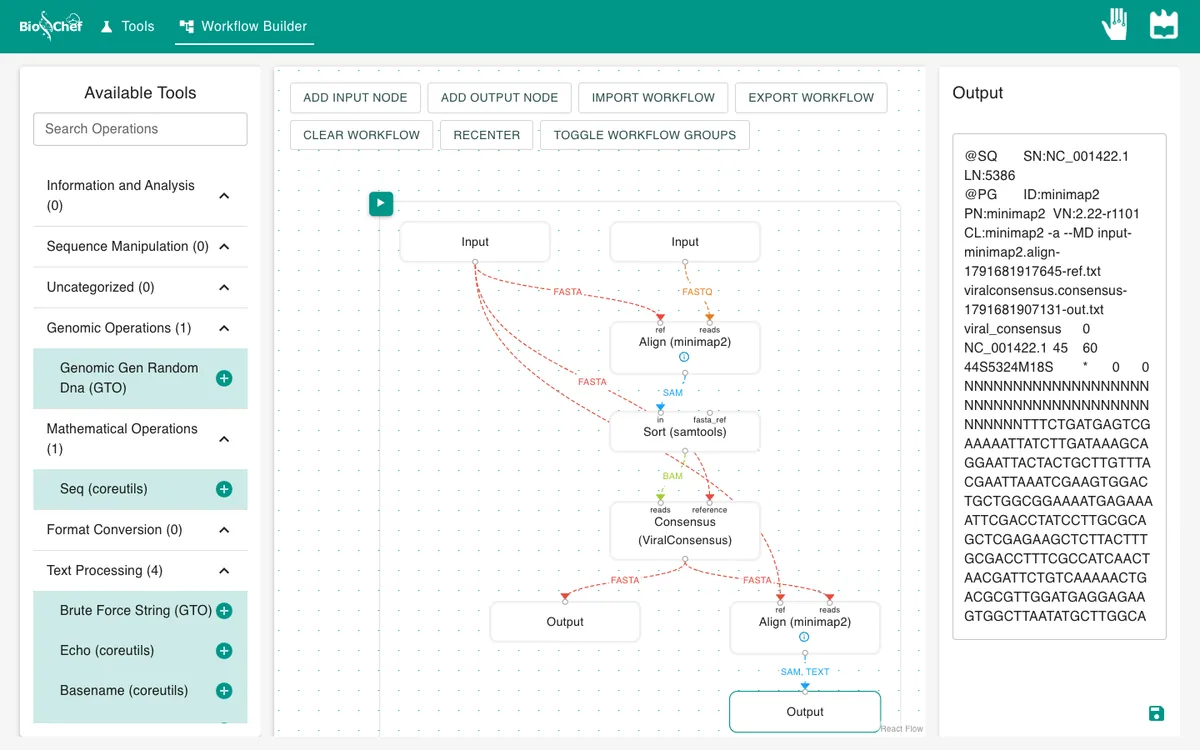
Select the consensus node and add another Align (minimap2): consensus into reads, reference into ref. Switch on sam_output and md_tag, add an Output and run again. You get one SAM line for the whole genome.
What you should see
viral_consensus 0 NC_001422.1 45 60 44S5324M18S ... NM:i:6 MD:Z:567G837T750T875T921C810G558
NM:i:6 means the consensus differs from the reference at six positions. The MD tag says where: the alignment starts at position 45, then 567 matches and a difference at 45 + 567 = 612, then 837 matches and a difference at 1450, and so on: 2201, 3077, 3999 and 4810. Those are exactly the six mutations in the sample.
Why the consensus starts and ends with N
The first 44 and last 18 bases are N. Reads cover the ends of a linear genome less, and there fewer than 10 reads cover each position, below min_depth. ViralConsensus writes N rather than guess, which is why the check alignment soft-clips them (44S and 18S). PhiX174 is actually circular; mapping to it as a linear sequence is a simplification.
Use the finished workflow
Import the finished workflow, data included, and press ▶. Remember that an exported workflow contains the data loaded in its Input nodes.
Exercise: accept less coverage
On the consensus node, switch on min_depth and type 5. Run again. How many N are left? With the default of 10 the consensus has 62; with 5 it has 30. Lower thresholds call more bases, from less evidence.
From a test to a full run
The browser is the place to build and test a workflow on small data like this. For full datasets, the same workflow file is meant to run next to the data with the BioChef agent, which is in development. See Workflows for how the two fit together.
More tutorials: all BioChef tutorials.
This tutorial is licensed under CC BY 4.0. If you use BioChef in your work, please cite Rosa et al., BMC Bioinformatics 2026. BioChef is listed in bio.tools as biotools:biochef.